
ISPF Create PDS Member
The Dataset List Actions allow users to perform a variety of operations on datasets directly from the Dataset List panel. After searching for datasets using a high-level qualifier (HLQ) or specific name patterns, ISPF provides options (known as actions) that can be used on the listed datasets or members. These actions include browse, edit, delete, rename, and many others.
Navigation - Option 3.4 (Data Set List Utility) from ISPF Primary Option Menu (ISPF Home Menu).
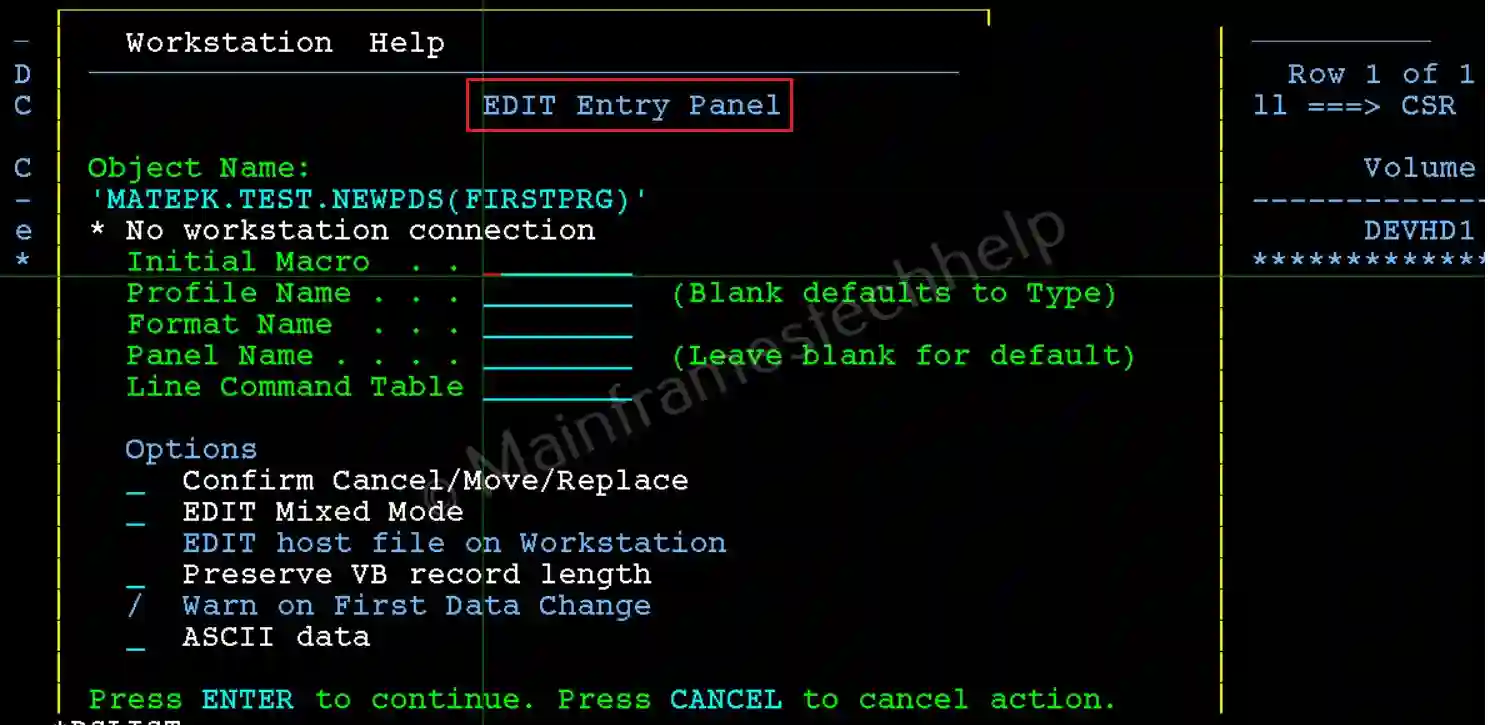
To allocate a new member in a PDS, option "E" is used before the PDS name and Member name should be enclosed in bracket at the end.
Create new Member in PDS -
Step-1: From the Data Set List Utility panel, enter the PDS in the Dsname Level field. Press Enter.
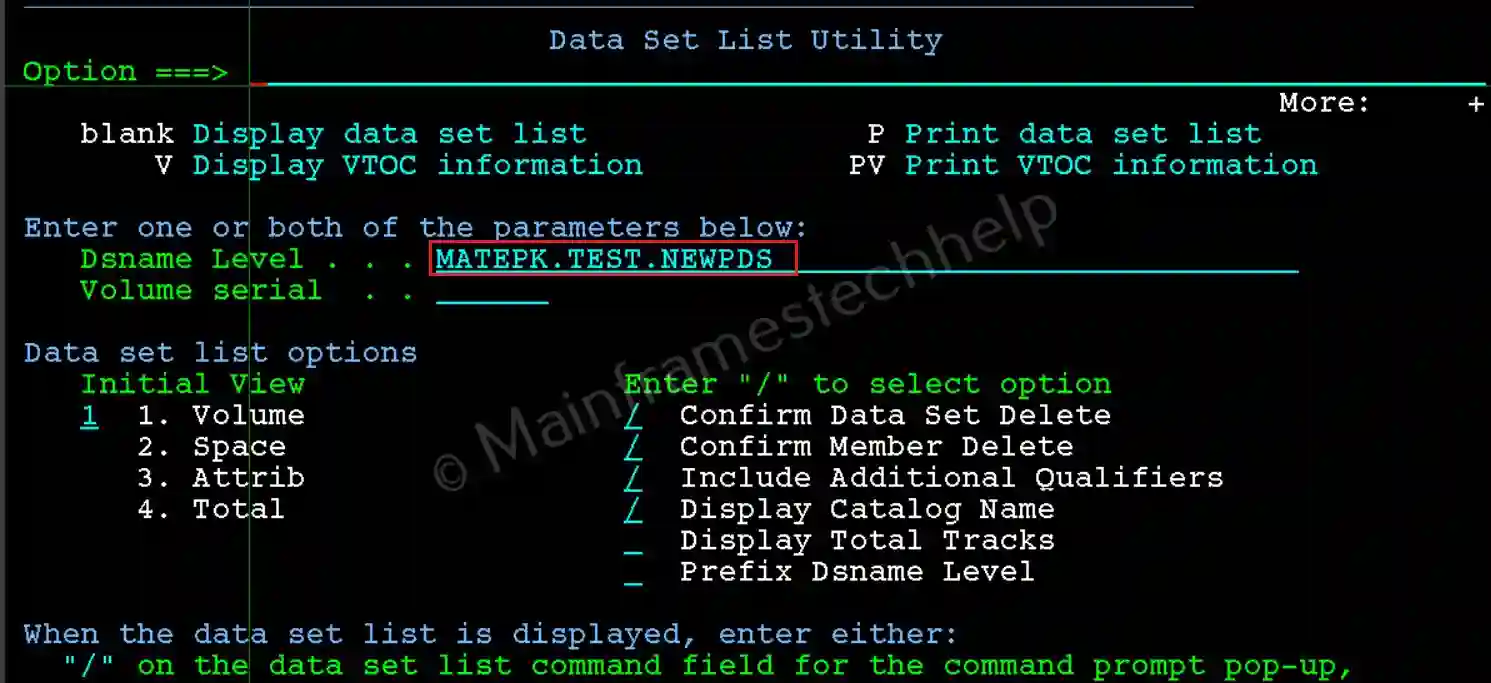
Step-2: If the dataset name is found in the system catalog the data set will display in DSLIST screen like below -

Step-3: Enter "E" infront of the PDS name and add member name at the end of the PDS name. Press Enter.

Step-3: Press Enter on the Edit Entry Panel to confirm the editing.
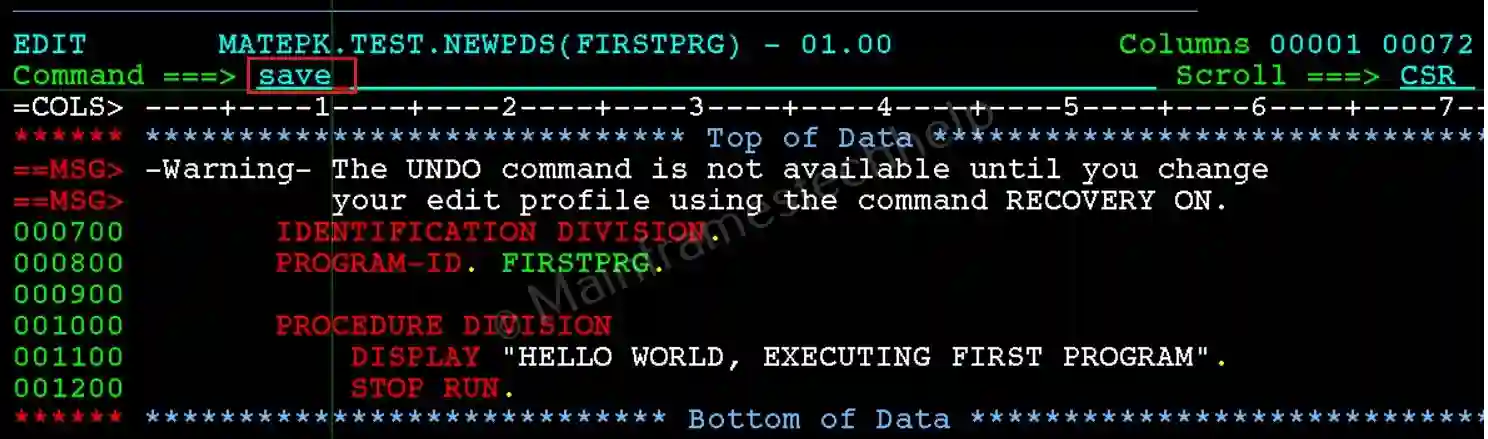
Step-4: New blank member gets opened. Add your coding and once it is done, enter the command save to save the member.
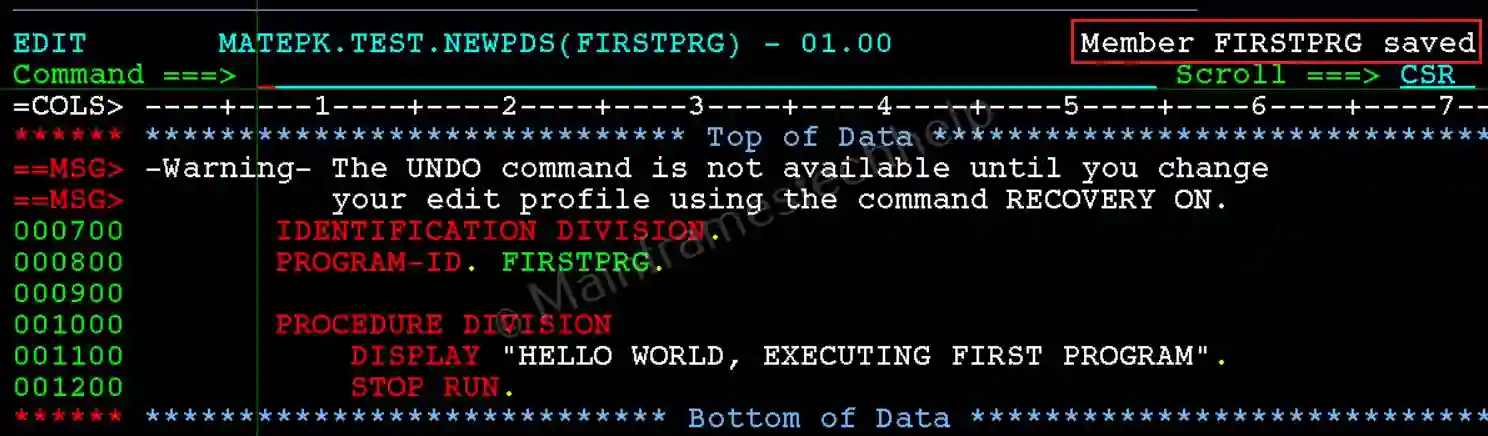
 Step-5: Once the member saved successfully, the Member prog_name saved appears on the right-top corner.
Step-6: Press PF3 to come out of the member and its navigates to DSLIST screen.
